

Buckle up – this isn’t a quick DIY hack list, it’s the full tale of our campervan build, with all the wins, fails, and lessons learned along the way. Hopefully, it gives you a mix of inspiration, reality checks, and practical tips if you’re planning your build.
When we bought our first van, we just wanted something cheap and practical, and in 2019 we built our first campervan, in the form of a silver 2006 VW Crafter, for about £6k. When we took that van on a five-week trip through France and Switzerland in 2021, we quickly learned the hard way that poor travel planning makes for a miserable trip. We spent too much time driving and not enough time enjoying places, so we ended up cutting the trip short and selling the van soon after.

We missed van life sooner than expected, so in early 2023, we set out searching for another van to convert, this time with a budget closer to £30k. Having the experience of one budget build behind us meant we knew where to spend money, where to save, and which mistakes not to repeat. That’s how we ended up with our second van: a white 2020 VW Crafter.
Buying the Van
We found our second van on Commercial Vehicle Auctions. When I went to view it in Livingston, Scotland, the engine management light was on (a common AdBlue issue), and there were a few minor dents, but otherwise, it was perfect.

During the online auction, Sophie accidentally muted my laptop just as our lot came up – chaos ensued, yet we still won!
Fixing the AdBlue issue was our top priority, and luckily, it was still under warranty, so we ended up with a brand-new DPF.
Top Tip
Always inspect a van in person if possible – look for engine lights, dents, scratches, and other potential issues.
Planning The Layout
Planning is key, but it’s an ongoing process; things change as the build progresses. Before we even brought the van home, we mapped out the basics: windows on either side, side pods (flares), and removing the bulkhead to incorporate the cab seats into the living space.
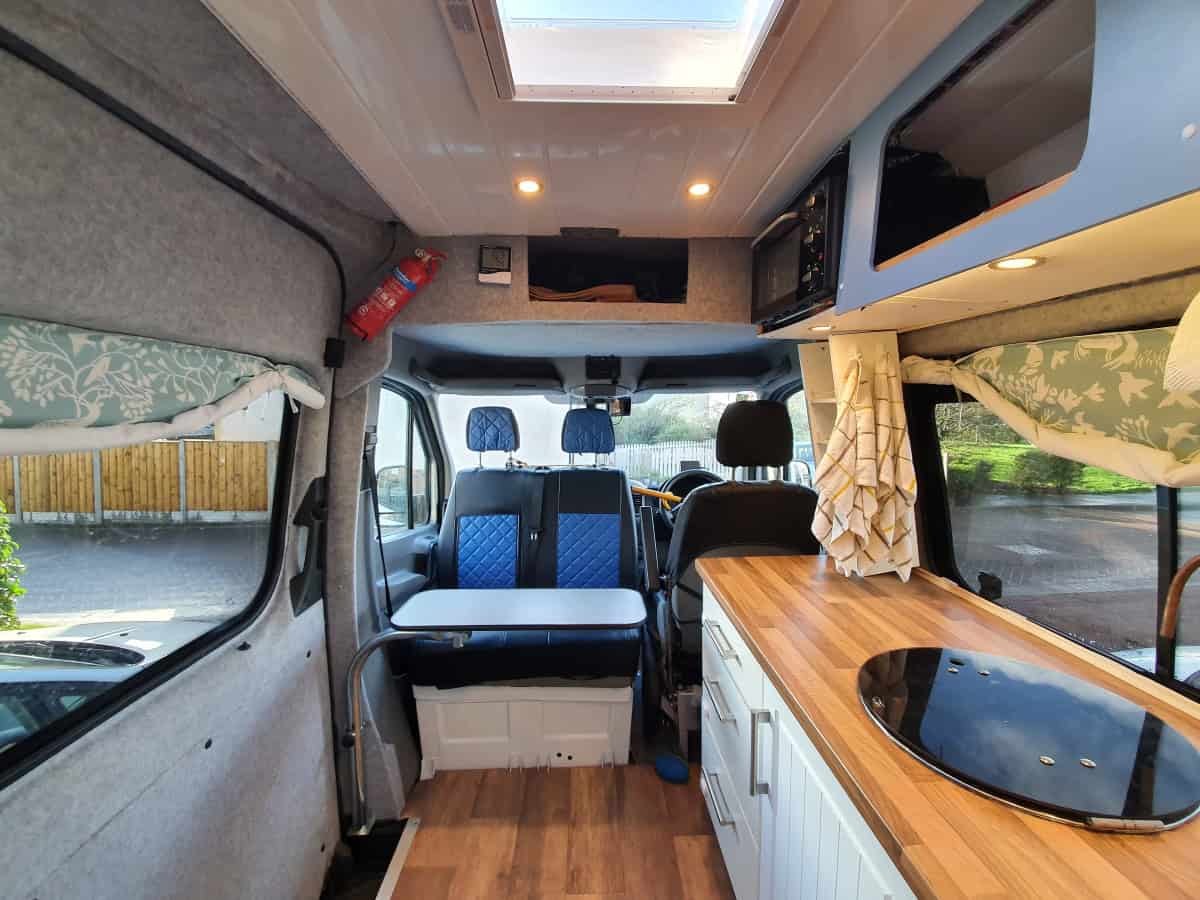
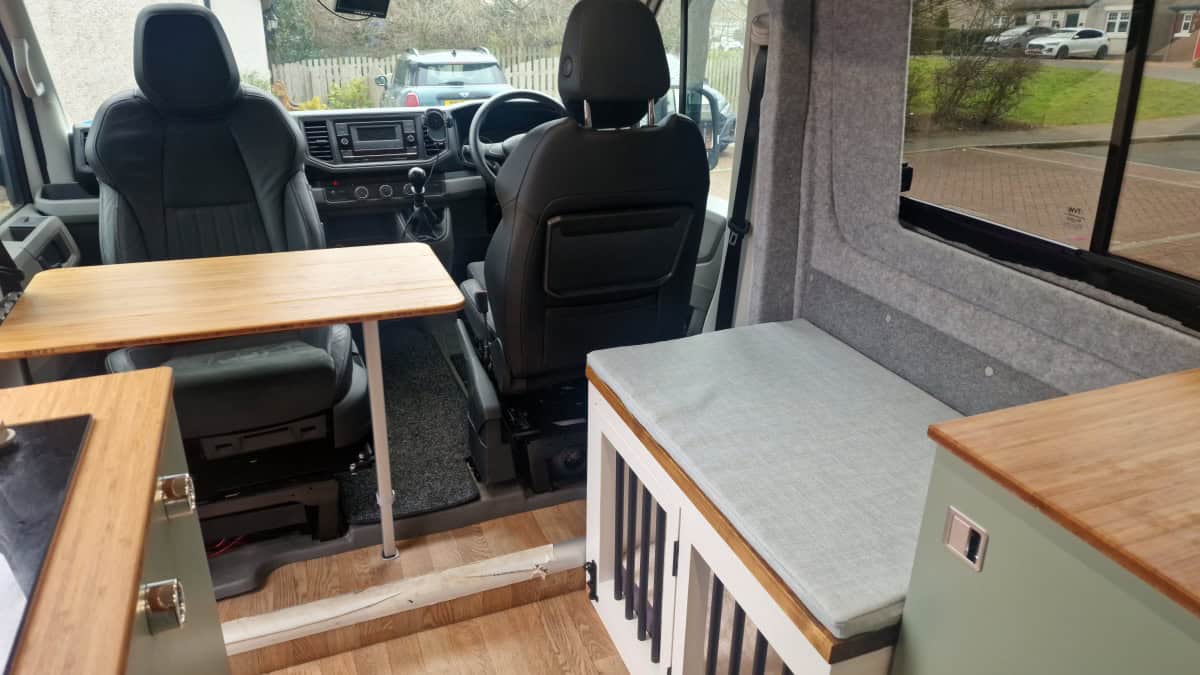
In our first van, we had a double passenger swivel, but it meant that we couldn’t easily access the living space without climbing out of the cab and opening the sliding door (not ideal when it’s pouring down outside). So, for our second build, we opted for two single swivel seats, which gives us a walkway into the back of the van.
One mistake we made in the first van was not planning properly for my height in the bed. At 6’2″, sleeping comfortably in a standard van bed is always going to be a challenge. Our fix ended up being a bit of a bodge job; an extension piece that clipped onto the bed frame so I could stretch my legs out. It worked, but it wasn’t exactly elegant.

That experience is what led us to add sidepods in the second build, giving us the extra length we needed without the workaround.
Top Tip
If you’re unsure about layouts, go and check out ready-made campervans at dealerships and events, or even rent one for a weekend. It’s a great way to find out what works for you before committing to a design.
Weight & Payload
Weight is a big part of planning because it affects both safety and legality. Most vans have a maximum authorised mass (MAM), and your driving licence might limit what you can carry. For example, if your van is rated at 3,500kg, fully loaded, it must stay at or below that limit unless you get it uprated (sometimes called ‘upplating’). Every cupboard, appliance, and litre of water adds up, so factoring weight in from the start ensures your layout is both practical and safe.
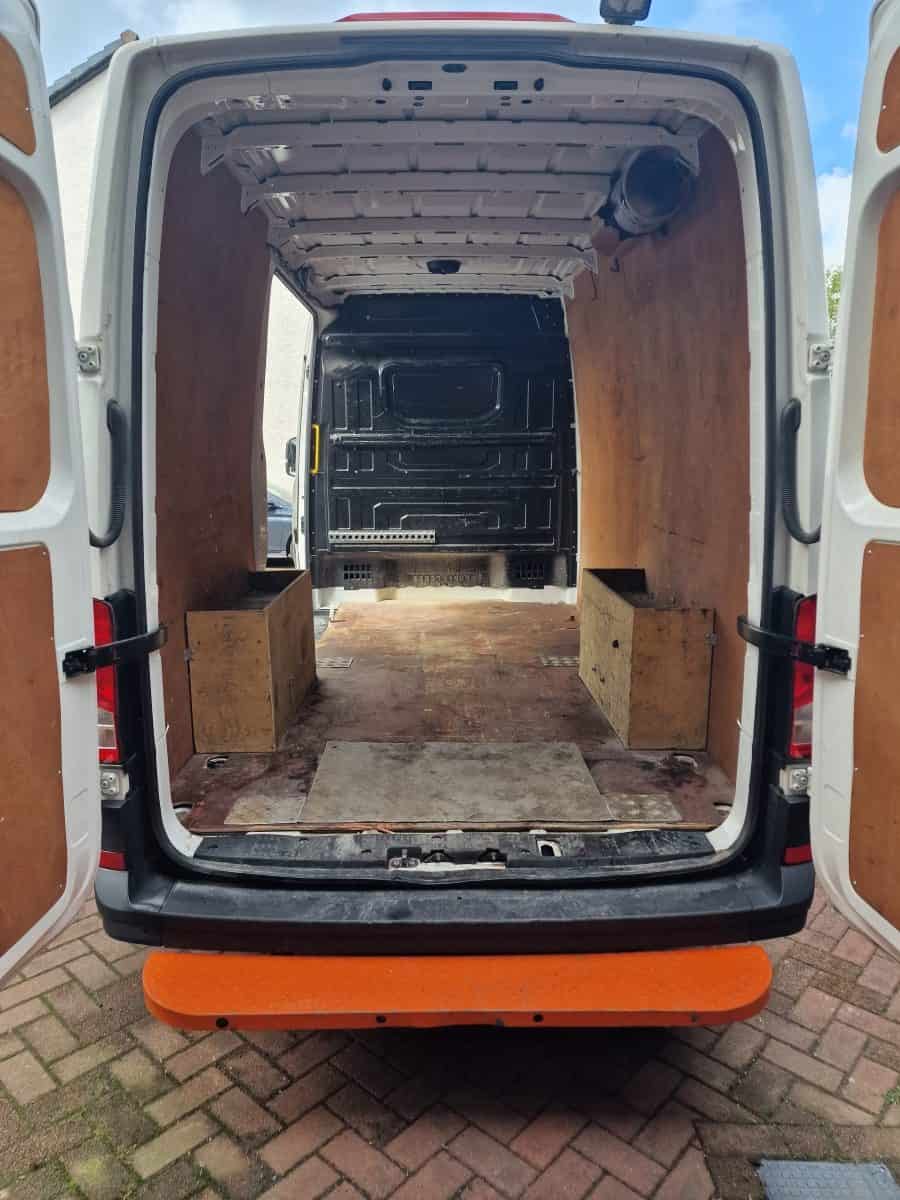
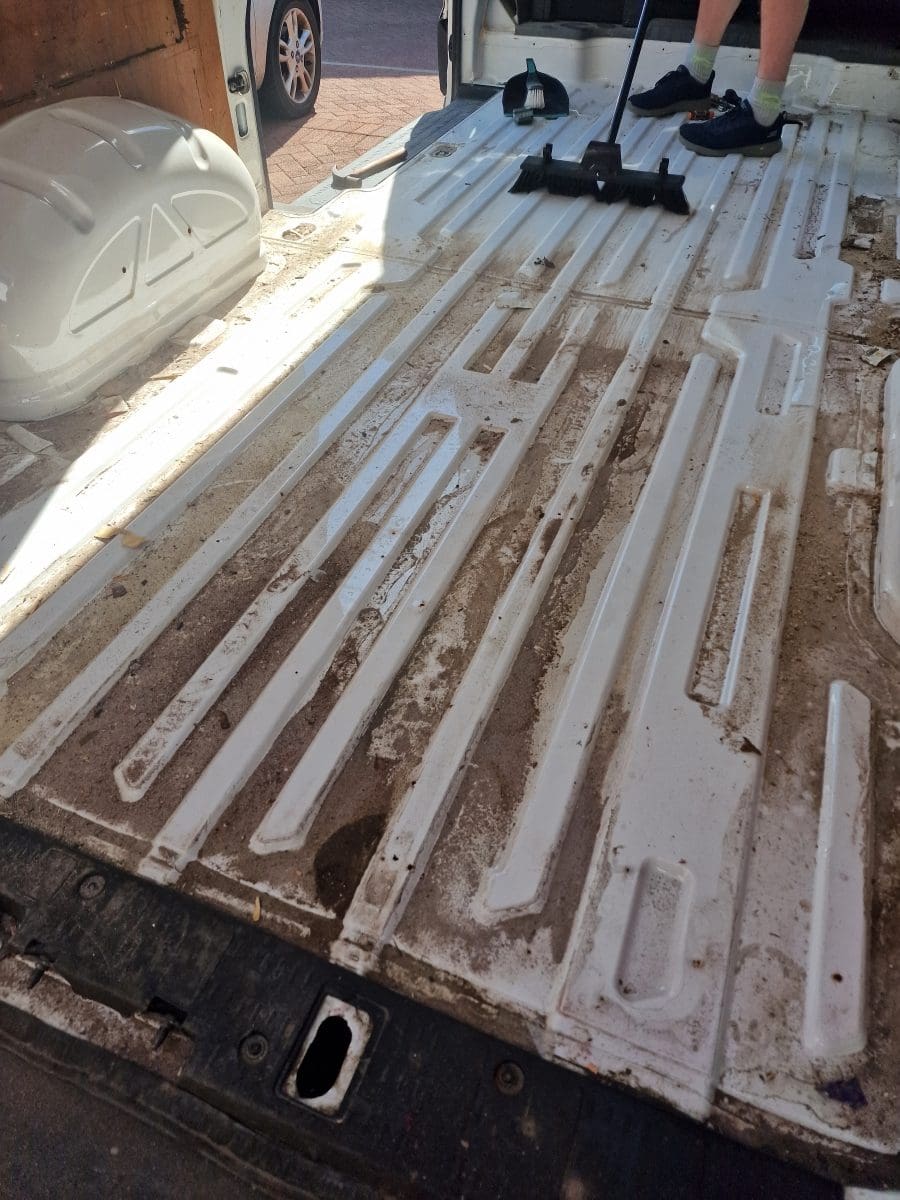
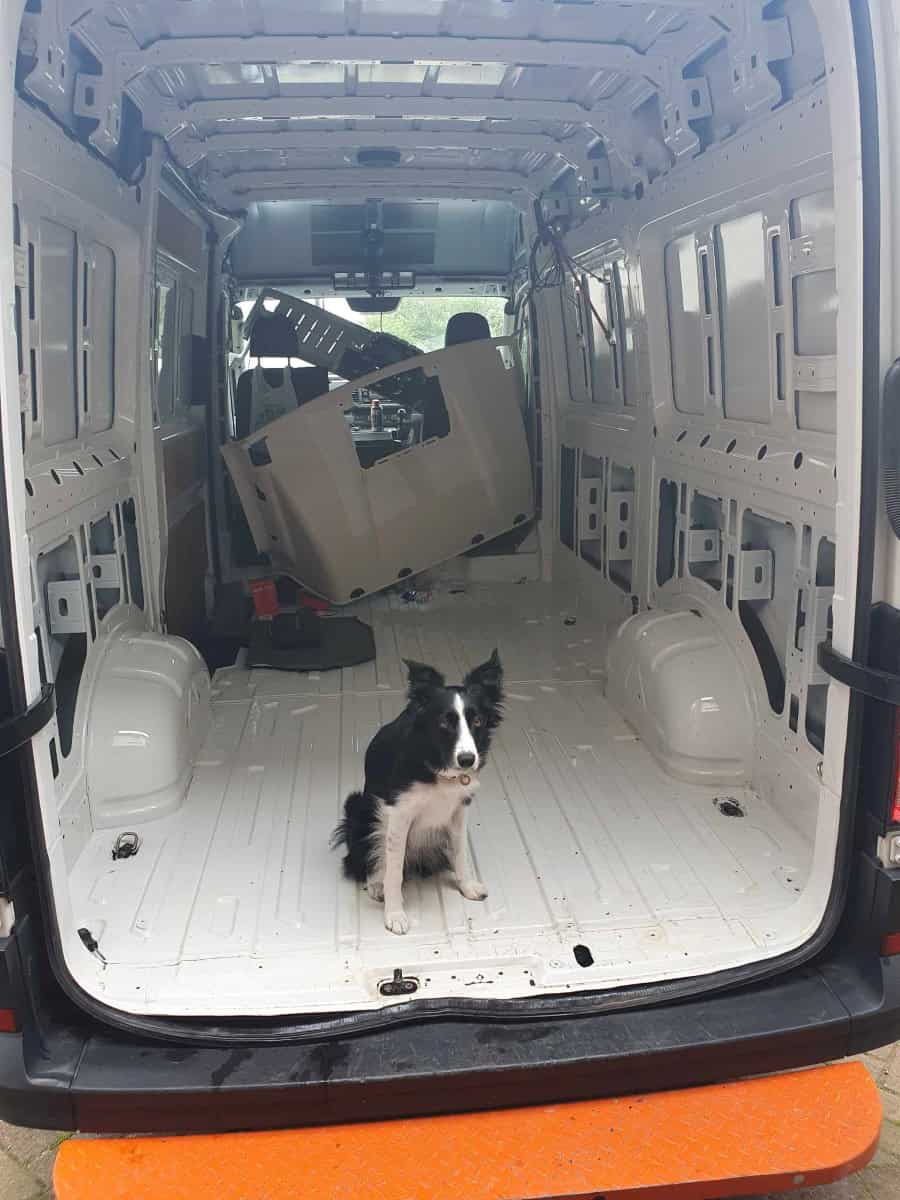
Stripping The Van Out
The first thing we did when we got the second van was to strip it out completely, which meant removing all the ply lining the walls and floor and taking out the bulkhead to open up the space. Once bare, we repaired any holes in the metalwork and checked carefully for leaks, treating any rust with converter, red oxide primer, and a coat of metal paint.
Top Tip
You can use a hose to check for leaks before you start your build. It’s much easier to spot and fix water ingress at this stage than once insulation and furniture are in place.
External Modifications
Once we had the layout planned, the next step was to start modifying the van’s shell to make it camper-ready.
Let There Be Light! (And Fresh Air)
We bought windows and side pods (flares) for each side of the van to bring in natural light and ventilation, with the side pods widening the van just enough to give us extra room in bed without making the van too bulky on the road.
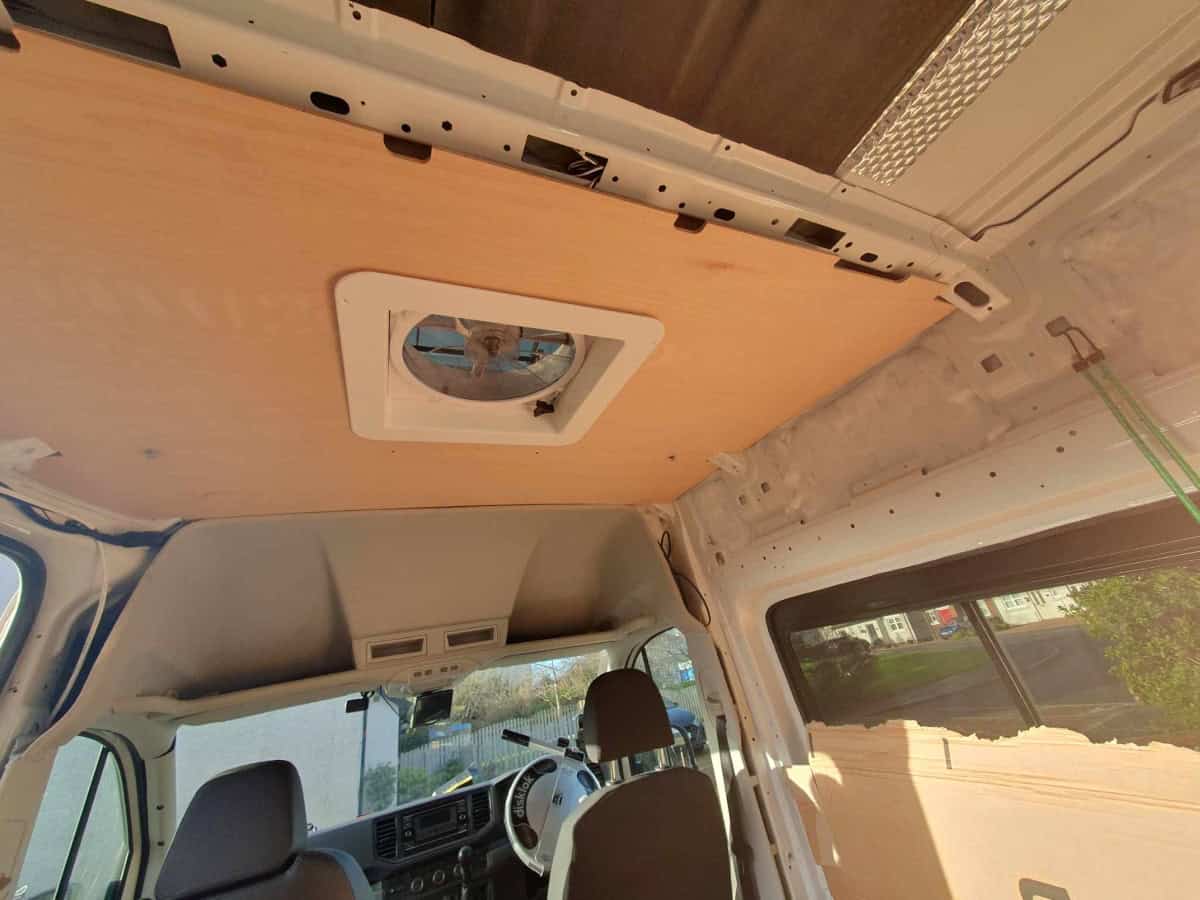
In our opinion, a skylight is essential in any campervan build. It lets in natural light and improves ventilation. Our first van had a basic skylight, but for the second build, we upgraded to a Maxxair MaxxFan. The built-in fan really helps with letting hot air and moisture escape, which makes a noticeable difference inside.

For the windows, side pods, and Maxxair roof fan, we did not trust ourselves to cut giant holes into the side of our van and successfully attach everything! Instead, we booked in with Lake District Campervan Conversions based in Threlkeld, Cumbria. Matt did an awesome job, and it meant we could crack on with the rest of our mods.
Top Tip
Even with a professional install, things can slip through the net. One of our windows had a small manufacturing fault that caused a minor leak. Luckily, the supplier sent out a replacement to us, and we managed to book back in with Matt to install the new one.
Roof Rack & Accessories
Next up was a sturdy roof rack to give us extra storage. We bought a second-hand aluminium Rhino roof rack, painted it black with Raptor, and then installed it.
Rather than fixing our solar panels directly to the roof, we attached them to the roof rack’s crawler board so they could get full sunlight and we could maximise our solar charge.
We also fitted a Thule awning to the side of the roof rack, above the sliding door, which turned into a bit of a nightmare when we discovered our first set of bracket holes wasn’t level and had to redrill them.
We fixed a lightbar to the front of the roof rack, and lastly, we mounted a reversing camera to make parking and tight manoeuvres a lot easier.


Top Tip
We recommend getting your outdoor electrical work sorted first; that way, you can run the glands and cabling without extra hassle later.
Insulating The Van

With the van prepped, the next major step was insulating the bare shell. There are plenty of insulation options out there, but it’s important to be careful with your choice, as some materials trap moisture, which can lead to rot and damage from the inside out.
We opted for recycled plastic insulation, a common and safe choice. Specifically, we used B&Q Diall insulation for most of the build, layering it with 6mm Dodo mat for extra insulation and sound deadening.
One debated topic in the campervan community is whether to install a vapour barrier – a membrane designed to stop moisture from the living area reaching the insulation and van body. We decided to skip a vapour barrier. They’re fiddly to install, and even a small hole can compromise their effectiveness. Plus, they stop the insulation from breathing, which means any trapped moisture can’t evaporate.
Interestingly, many professional campervan conversion companies don’t use vapour barriers either.
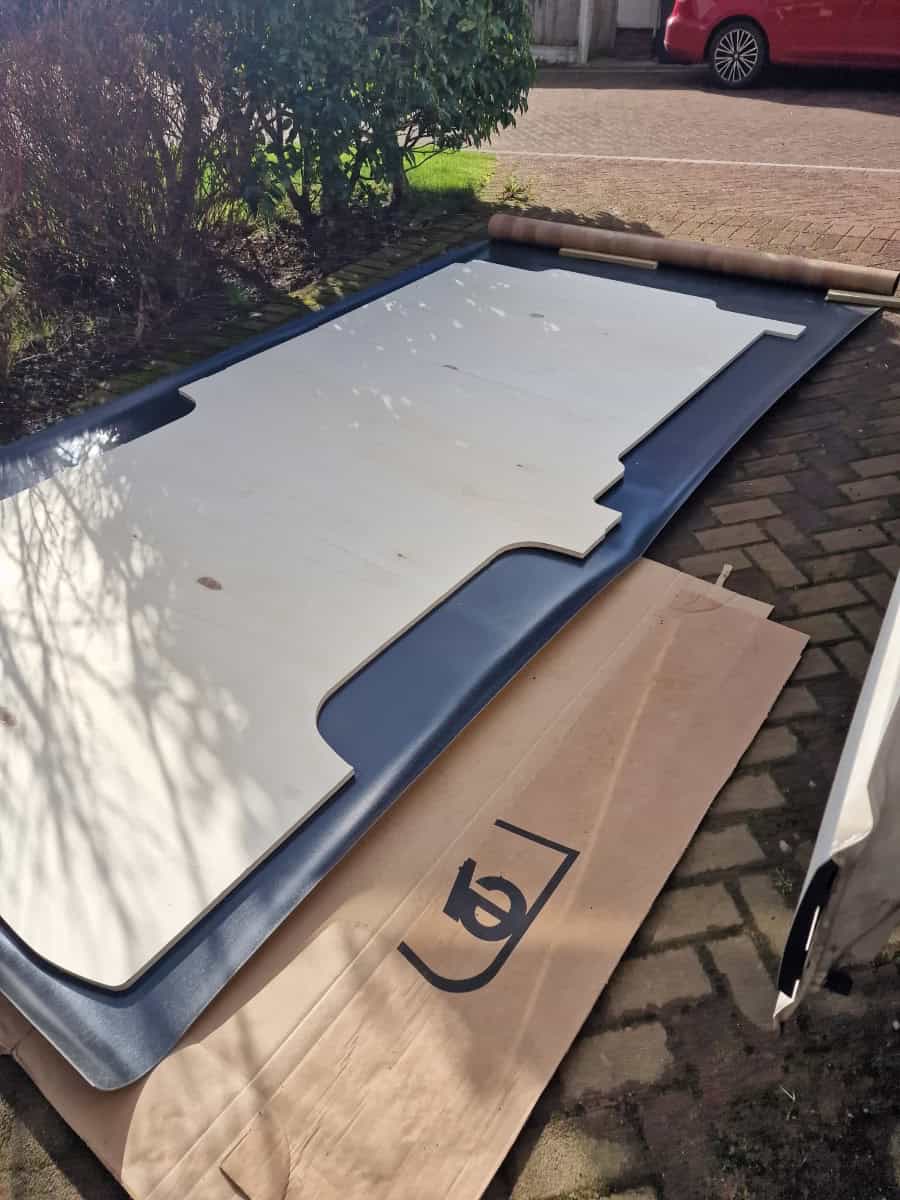
Floor & Ceiling Finishes
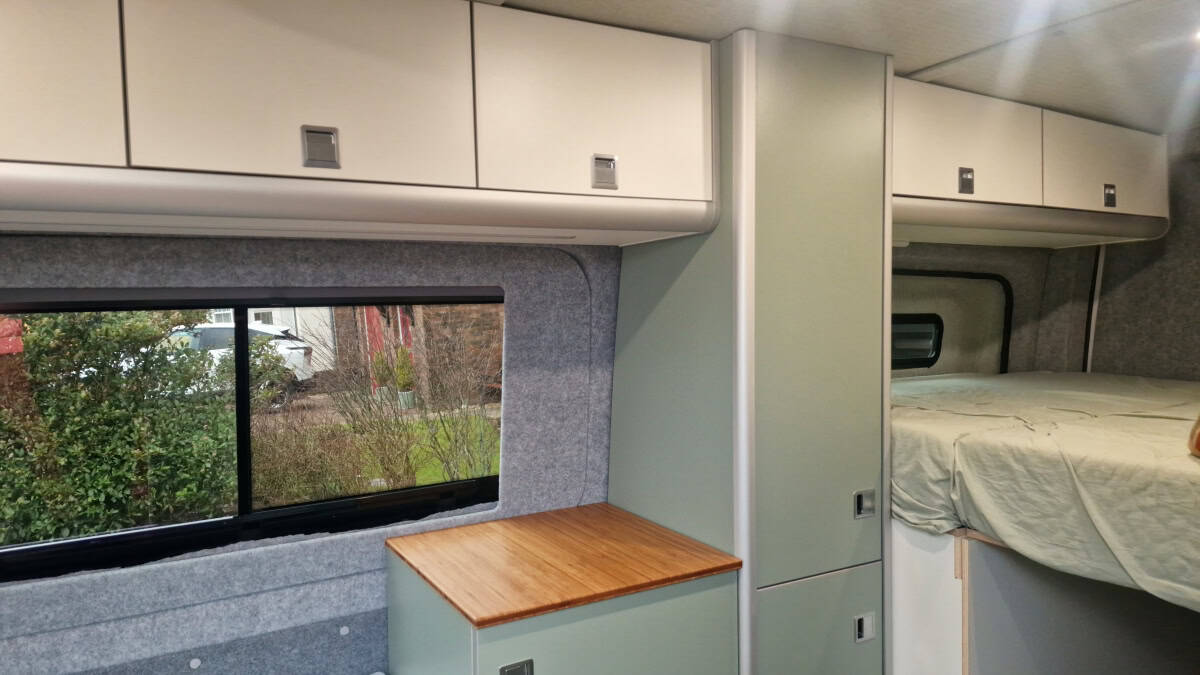
For both the floor and ceiling, we used pre-shaped panels from EVO designed to fit our van. We covered the floor panels with vinyl flooring, then cut openings in the roof panels for the skylight surround and LED lights. Finally, we finished the ceiling with a green herringbone fabric to tie in with the green units we had ordered.

Top Tip
Before making any cuts, hold the panels in place and mark out where your roof fan, lights, and any other fittings will go. It’ll save you from costly mistakes and make the installation much smoother.
Carpet Lining The Walls
The walls, doors, and any exposed metal were covered with two different shades of carpet lining – a material you’ll see in almost every van build. Carpet lining not only gives a neat, professional finish but also adds an extra layer of insulation and soundproofing.

Gas Tanks & Pipework
While our previous van had two 6kg gas bottles in a cabinet, for this one we opted for an underslung gas tank, which meant removing our spare wheel. We installed the tank and ran the pipe to the hob, and then took it to Autogas 2000 Leisure Ltd in Thirsk, where the professionals checked everything over and filled the tank for the first time.

For us, we only use our underslung gas tank for the cooking hob, which honestly feels like overkill. If you’re looking for minimal cooking use like we do, I’d recommend ditching gas altogether and going for an electric induction hob instead. Add an extra battery, and you’ve got a setup that’s not only cheaper but much safer.
If you do decide to install gas, here’s a tip from experience: make sure the system is fully isolated before boarding a ferry. Crawling under the van at the ferry terminal to isolate the gas while holding up traffic is a stressful and embarrassing moment you definitely want to avoid.
We have said that if we were to do this again, we would go the full electric route, as we had a gas leak (external, thankfully) when we were away in Northumberland. We isolated it and just had to make do with sandwiches until we could get it fixed.
Top Tip
Even if you’re confident in your DIY skills, having a qualified engineer inspect (or even handle) the full install ensures everything’s safe and compliant.
Diesel Heater Installation
Across both our van builds, we went with diesel night heaters. Both times, we went with cheaper models (referred to as Chinese diesel heaters) that are approximately one-fifth the price of better-known brands. The key with these is to ensure that you run them hot before shutting them down to maintain smooth operation.
For the first van, we had a separate diesel tank inside the living space, but for the second van, we opted to install a sender unit on top of the fuel tank so the heater receives the diesel directly from the vehicle’s fuel tank. It’s far more practical and feels a lot safer.

Top Tip
Be mindful when positioning a diesel heater. You’re working around the vehicle’s exhaust, fuel lines, and other components, and you need to keep the air intake well away from both the vehicle exhaust and the heater’s own exhaust to avoid fumes being drawn inside.
Electrical Wiring, Chargers, & Systems
When it came to the electrical setup, we knew this would be a crucial part of the build, so planning was key.
Solar Panels: For solar panels, we went with 3x 100W Renogy solar panels. We figured this would provide us with ample power.
Batteries: We chose 3x 100Ah Eco Worthy Lithium batteries. They provide all the features of higher-end batteries, except they don’t have the self-heating function that protects batteries from frost in very cold temperatures. For our needs, they struck a good balance between cost and performance.
Wiring: We wanted a clean look, so we planned to hide almost all our wiring behind the walls. This meant installing about 90% of the electrical system before building any furniture. Proper planning is vital; you need the right cable sizes for each appliance and adequate protection with fuse boxes. If you’re unsure about cable sizes, always check manufacturer instructions or use an online calculator.
We wired for:
- Interior lighting
- Maxxair fan
- Fridge
- Inverter
- USB charging ports
- Hob electrical ignition
- External appliances (awning light, solar panels, light bar)
- Battery chargers
- Earth/grounding points
Lesson Learned
In Germany, all of our power went out, it turns out that one of our earthing points wasn’t secured properly and was shorting. Be sure to check all of your connections.
Battery Chargers: On our previous build, cheaper chargers failed, so this time we invested in Victron chargers, which are more reliable and widely respected.
Battery chargers generally fall into three types:
- Battery-to-Battery chargers
- Solar chargers
- Mains chargers
We installed all three because of our long travel periods and to keep things flexible. We used a Lynx distributor to organise the wiring and add protection. With our solar panels, the solar charger alone keeps our batteries above 90% most of the time, even when running the air fryer, laptops, fridge, and device chargers, and we don’t often need to rely on the battery-to-battery or mains chargers.
Mains Electric: Having a mains electricity hookup is handy for campsites, but it should be professionally installed for safety reasons. We’re confident working with electrical systems, so we installed ours ourselves, following several YouTube tutorials.
Inverter: We use a Renogy 1000W inverter, which is compact but powerful enough to charge laptops, run our Cosori air fryer, and power a low-wattage hair dryer like the T3 AireBrush.

Top Tip
Plan where every socket, light, and appliance will go, then size your cables and components correctly. Run wires across the ceiling and walls before panelling and carpet lining – it’ll save you tearing things apart later or having loose wires hanging around.
Water Tanks, Pipes, & Plumbing
Fresh water is essential for any campervan.
In our first van, a 25-litre bottle shared the cupboard under the sink with a grey water bottle. You had to pull the grey water pipe out to get the grey water out to empty it, and of course, the pipe would inevitably drip everywhere.
This time, we upgraded to a 63-litre underslung tank with a 12V Shurflo pump. It fills easily from campsite hoses, gives enough water for a few days of cooking, washing, and drinking, and frees up cupboard space. We skipped a hot water system, so the water is cold unless heated on the hob.
For grey water, we didn’t install an underslung tank. Instead, a pipe leads outside to a separate portable tank we place underneath when parked, avoiding the need to align perfectly over grey water disposal points at campsites.

Top Tip
Keep water tanks low and balanced. Water is surprisingly heavy (1 litre = 1kg), so placing tanks too high or unevenly can affect your van’s stability and handling.
The Bathroom Situation… Or Lack Of
For both our van conversions, we went without a bathroom; we decided it wasn’t practical for us for a few reasons. First, the amount of water we’d need for daily showers would cut into our supply for washing dishes and drinking. Showers can cause condensation, which we wanted to avoid. And finally, a bathroom would take up a lot of valuable room, which we preferred to use for storage.
Instead, our cassette toilet, a Thetford 365, lives in a cupboard which we had custom-sized to accommodate it. And yes, that does mean that we use the toilet in the middle of the van, shocking, we know.

Flatpack Furniture & Conversion Kits
Our first van build was a bit rough and ready: we measured and cut ply, installed some B&Q kitchen units, and made it work, but it lacked the polished, camper-ready feel we wanted. The kitchen in particular was lacking: a single-burner fold-away hob with attached sink, mismatched cupboard fronts, and heavy drawers without catches meant a flying cutlery incident on the NC500. Plus, the tap had a flick switch, giving us no control of the water pressure.
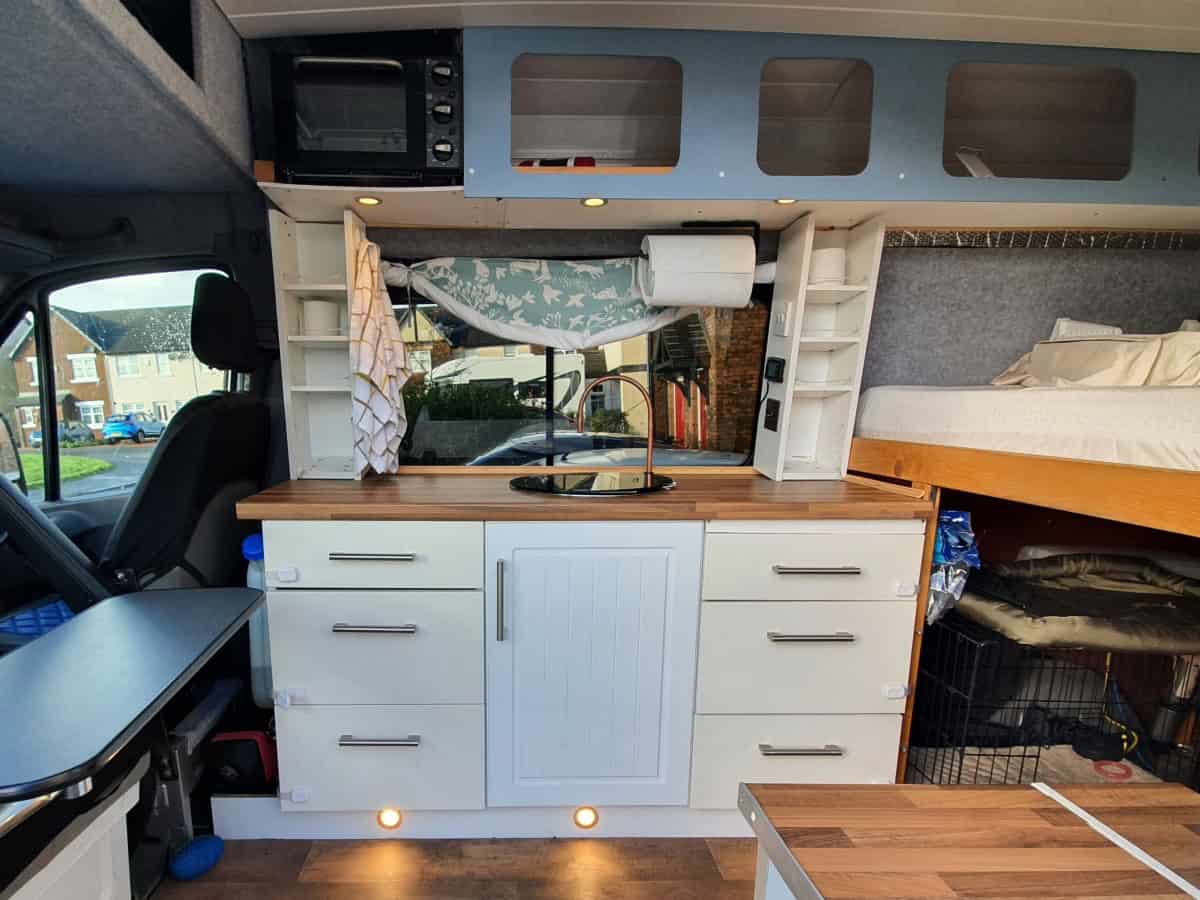

For the second van, we wanted something more professional without the full installation cost. We went with an EVO Motion Design conversion kit. The result is a solid, sleek finish, though fair warning, if you think IKEA instructions are tricky, EVO’s are on a whole other level!

One standout feature of the build was the kitchen; the new setup includes a dual-burner hob, a proper tap, a spice rack, and ample storage for all the cooking essentials. And the best part? Washing up is so much easier now that there’s a proper tap.

Top Tip
Be sure to factor in lead times when ordering furniture or conversion kits. Some companies can take weeks (or even months) to deliver, so order early and plan your build schedule around it.
Lucy’s Lounge: Dog-Friendly Travel
Since we travel with our dog, Lucy, we knew she’d need a secure spot for the drive. In the first van, we used a standard dog crate in the back, as she wasn’t too keen on sitting nicely up front on the seatbelt harness, too many cars to chase! Not that that mattered anyway, because we took the front seat option from her very early on in the planning process.
For this van, we held off fully finishing the build until we could figure out the most practical and comfortable setup for her.

And the answer came in the form of a crate/bench hybrid from a seller on Etsy. The bench gives us an extra seating area and lets Lucy keep an eye out the window, while the crate provides her with her own secure space. We did have to brake harshly on one occasion in Italy, and we were so grateful Lucy was tucked away on her bed.

Top Tip
Always secure your dog when driving. In most countries, it’s a legal requirement to keep pets restrained while the vehicle is moving. A crate, harness, or bench/crate hybrid keeps your dog safe and prevents distractions while driving.
TV & Entertainment
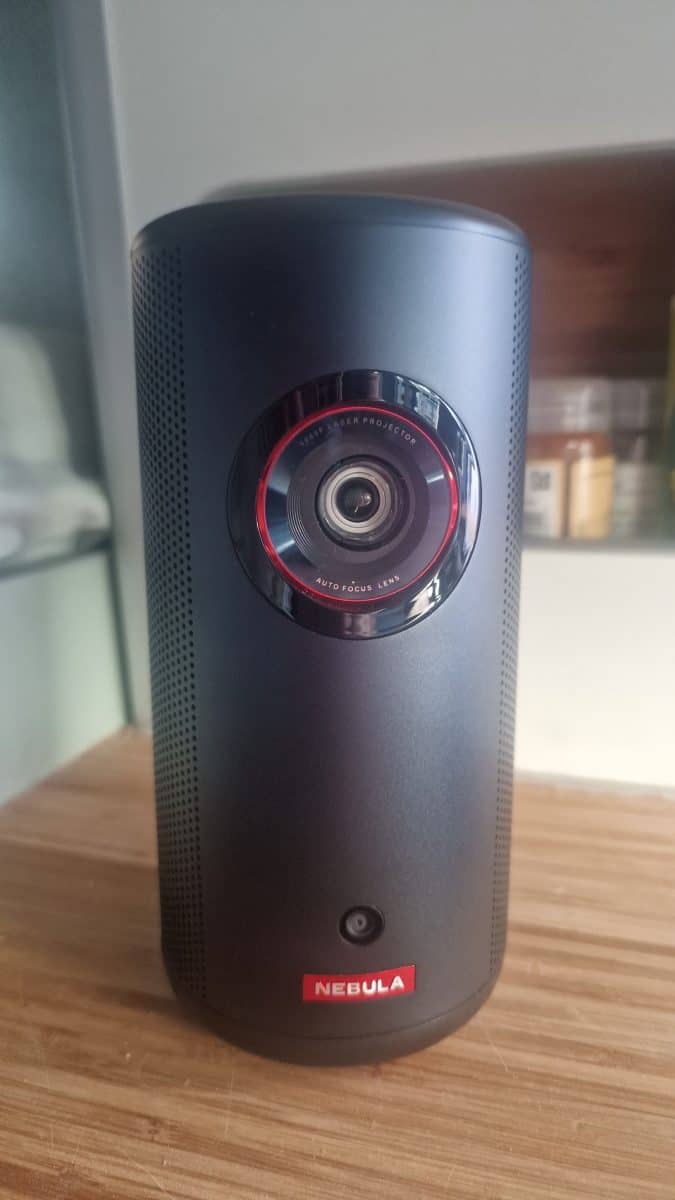
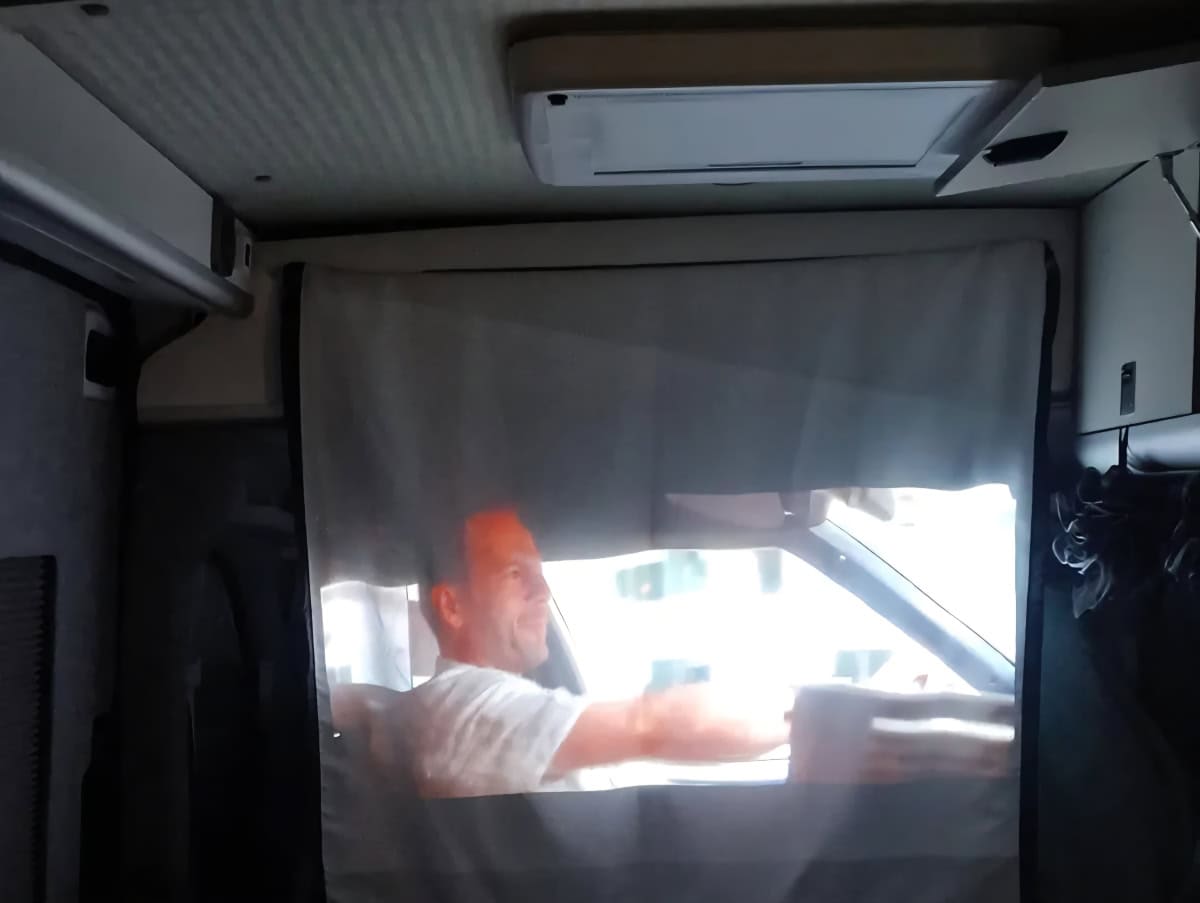
There are plenty of low-voltage TVs out there, but they take up valuable space. Instead, we opted for a Nebula Capsule projector, which packs away easily when not in use. It has its own battery, charges via USB, and lasts just about long enough for a full movie. Plus, we love the option to use it outdoors when the weather’s good.
Safety Features
Safety isn’t the most exciting part of a van build, but it’s one of the most important. Here’s what we fitted for peace of mind on the road:
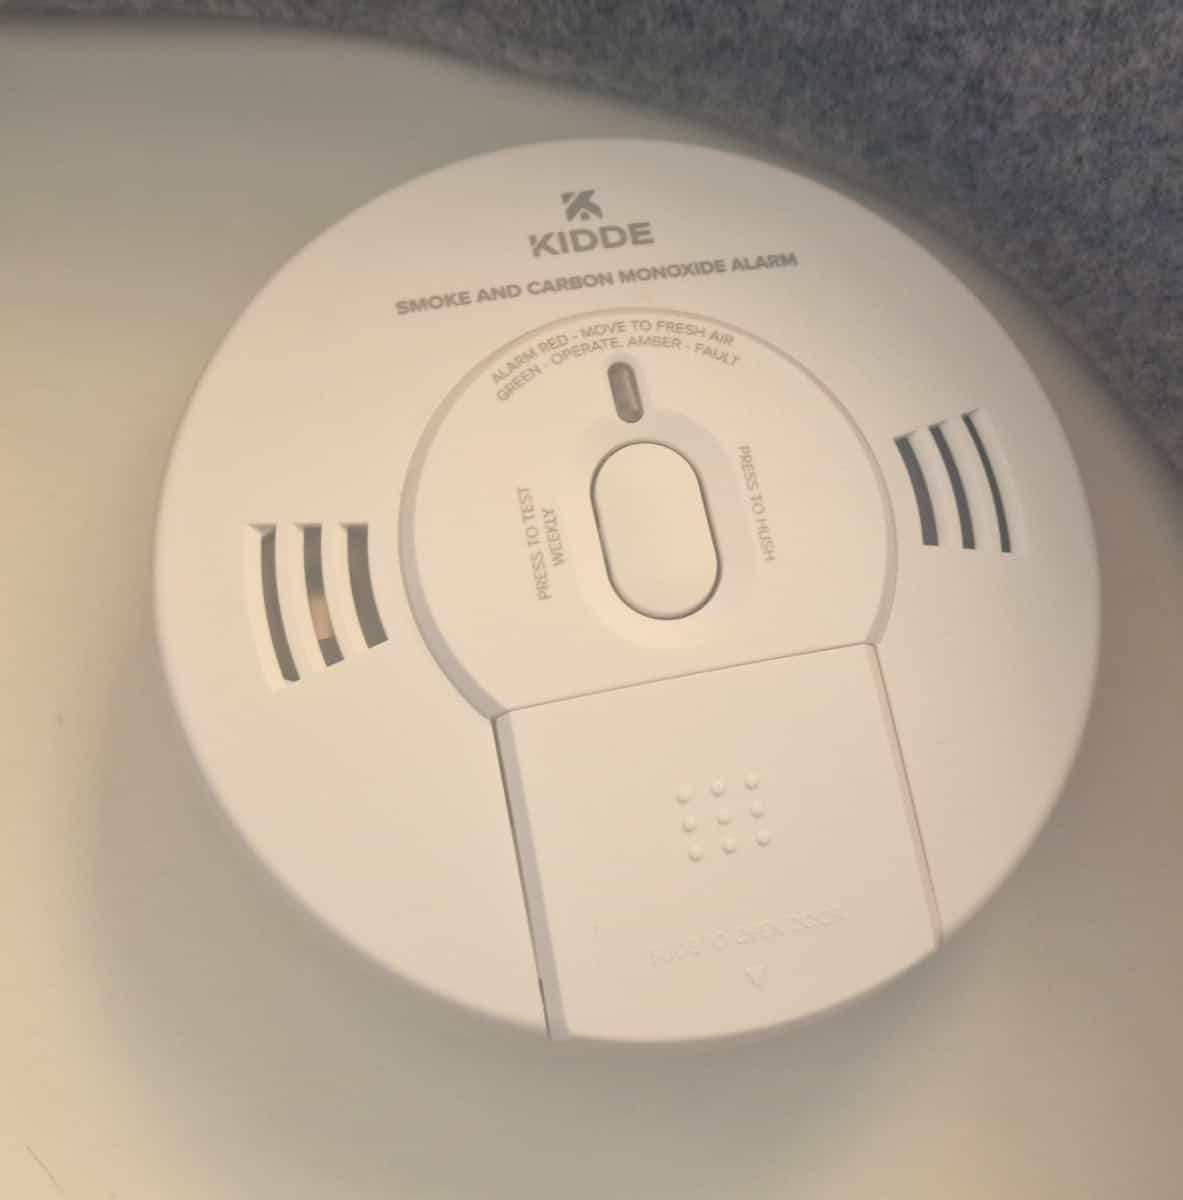
- Combined Carbon Monoxide & Smoke Alarm: One unit, less faff, and it covers the essentials.
- Fire Extinguisher: Located where we can grab it quickly if we ever need it.
- First Aid Kit: Tucked away but always easy to get to.
- Gas Shut-Off Valve: Ours is mounted underneath the van, so we can isolate the system completely when needed.

Engine Remap
We also had the van remapped to give it a bit more power. It’s not the most glamorous part of a conversion, but it makes a noticeable difference once the van is fully loaded. I went down to Darkside Developments to get a Stage 1 ECU remap for the van. Long motorway drives feel smoother, and it copes better on hills, which is very welcome when you’re carrying all the extra weight of a camper build.

DVLA Motor Caravan Registration
Changing your converted van into a recognised ‘motor caravan’ with the DVLA is something that is debated in the van build community, mostly because the benefits aren’t largely clear.
Reasons To Change
For us, there were two main reasons to pursue this change.
1. Insurance
While the body type on the V5 doesn’t directly affect your insurance category, it does make a difference in practice. If you keep your van registered as a light goods vehicle (or van with windows), you’ll need to declare every single internal modification to your insurer, and a long list of modifications can push premiums up.
By changing the body type to motor caravan, you’re essentially rolling all those changes into one. Insurers recognise the vehicle as a camper, which means the policy covers the fixtures, fittings, and often the contents too. It’s usually simpler, sometimes cheaper, and gives you better protection overall.
2. Speed Limits
Another big benefit is speed limits. Goods vehicles don’t have the same limits as cars or motor caravans. For example, a goods vehicle is restricted to 60mph on a dual carriageway, but a motor caravan not exceeding 3.05 tonnes maximum unladen weight can legally travel at 70mph, the same as a car.
If you’re caught doing 70mph in a van still registered as a goods vehicle, you can argue your case by proving it’s a camper, but you’d have to do that every single time, which sounds like a paperwork nightmare. We don’t often drive that fast anyway, but it’s reassuring to know that with the motor caravan classification, we’re fully covered.
Note: If your motor caravan exceeds 3.05 tonnes maximum unladen weight, you’re still restricted to lower speed limits. You can check out official speed limits on the GOV.UK website.
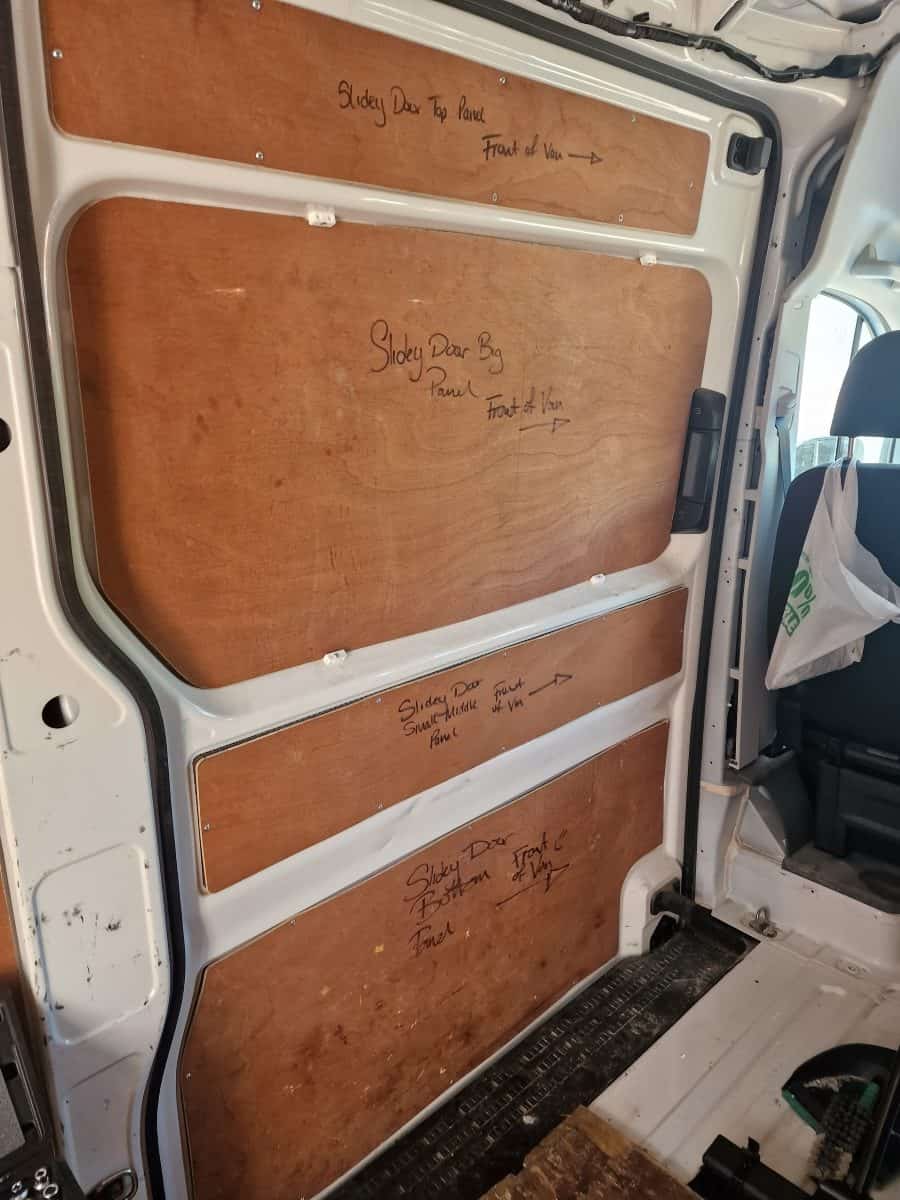
The Process
To change the body type to motor caravan, we followed the process outlined on the GOV.UK website. This meant completing the motor caravan conversion checklist and sending off plenty of photos and labelling every single one (sometimes being a bit pedantic), just to be sure there was no room for confusion.
The below is honestly just a tiny snapshot of what we sent off.

And of course, this being the DVLA, each photo had to have our vehicle registration number, the date, and a written description scribbled on the back.
We were lucky in that our build ticked every single box, though we’ve heard of people being approved even if they were missing one or two external features.
Lesson Learned
Changing our van from a light goods vehicle to a motor caravan meant starting our no-claims bonus from zero. If you’re thinking of reclassifying, check how it affects your insurance; sometimes the administrative hassle or loss of no-claims can outweigh the benefits.
Cost & Timeline
We didn’t keep a meticulous record of every penny, we’d probably cry if we did. But for a rough idea: the base van set us back around £20,000, and everything else, furniture, electrics, insulation, and all the little bits, added another £10,000–£12,000.
Timeline-wise, this build was a slow burn. We bought the van in May 2023, but didn’t get started in July thanks to our DIY wedding. EVO furniture arrived in November 2023, most of it was installed by August 2024, and we finally wrapped up the last jobs in February 2025. It took longer than planned, but working around jobs, weather, and a wedding, we got there in the end.
The Grand Tour
If you want to see the final product, then check out our van tour video below:
Frequently Asked Questions
In most cases, it’s cheaper to convert a van yourself, especially if you already have tools, time, and some DIY skills. Buying a ready-built campervan from a dealer often comes with a hefty markup for the professional finish and convenience. However, the final cost depends heavily on the base van you choose and what you decide to put in it.
Yes, doing it yourself is nearly always the most cost-effective route. That said, DIY comes with trade-offs in time, effort, and the learning curve. You’ll save money, but you’ll spend more time planning, sourcing materials, and building.
It depends on you — your budget, your priorities, and how much you’re willing to take on yourself. Some people manage a basic build for a few thousand pounds, while others spend £20,000+ chasing a high-end finish. The biggest cost variables are the base van itself and the quality of the materials, appliances, and systems you choose to install.
You can save a lot by doing the work yourself, buying second-hand parts, and keeping things simple. But if you want top-spec electrics, fancy cabinetry, or a bathroom setup, the costs add up fast. Our advice: decide what kind of travel you want to do, then build around that — not just what looks good on Instagram.
Again, it depends on you – how much of the work you’re willing to take on yourself, lead time for furniture/conversion kits, availability of conversion companies, etc.
This depends on your needs. Some people prioritise headroom, others care more about external dimensions for parking, and some want specific engine types for reliability or emissions zones. Common favourites include the VW Crafter, Mercedes Sprinter, Peugeot Boxer, and Ford Transit.
Newer vans can come with more engine issues than older models, mostly because of stricter emissions regulations. Features like AdBlue systems and diesel particulate filters (DPFs) are great for the environment, but they add complexity and more potential things that can go wrong – I could tell you all about our NOx sensor issues in Germany, but I’ll save that story for another time.
We hope this gave you a solid insight into how our second van came together, and what we learned from doing it all once before. If you have any specific questions or would like to know more about our build, please don’t hesitate to get in touch or leave a comment below.
